I have always liked sweater pumpkins when I have seen them at the store and wanted to try to make them for less money. I have never made them before, so I was unsure how they would turn out. Sweater pumpkins are the perfect mash up for when the seasons change, sweaters AND pumpkins! A sweater pumpkin is a perfect reminder of cool, crisp, fall days with some warm hot chocolate and a cozy sweater or knit blanket to bundle up in! Can you tell that I love fall?
To make the sweater pumpkins, I purchased three pumpkins at The Dollar Tree.
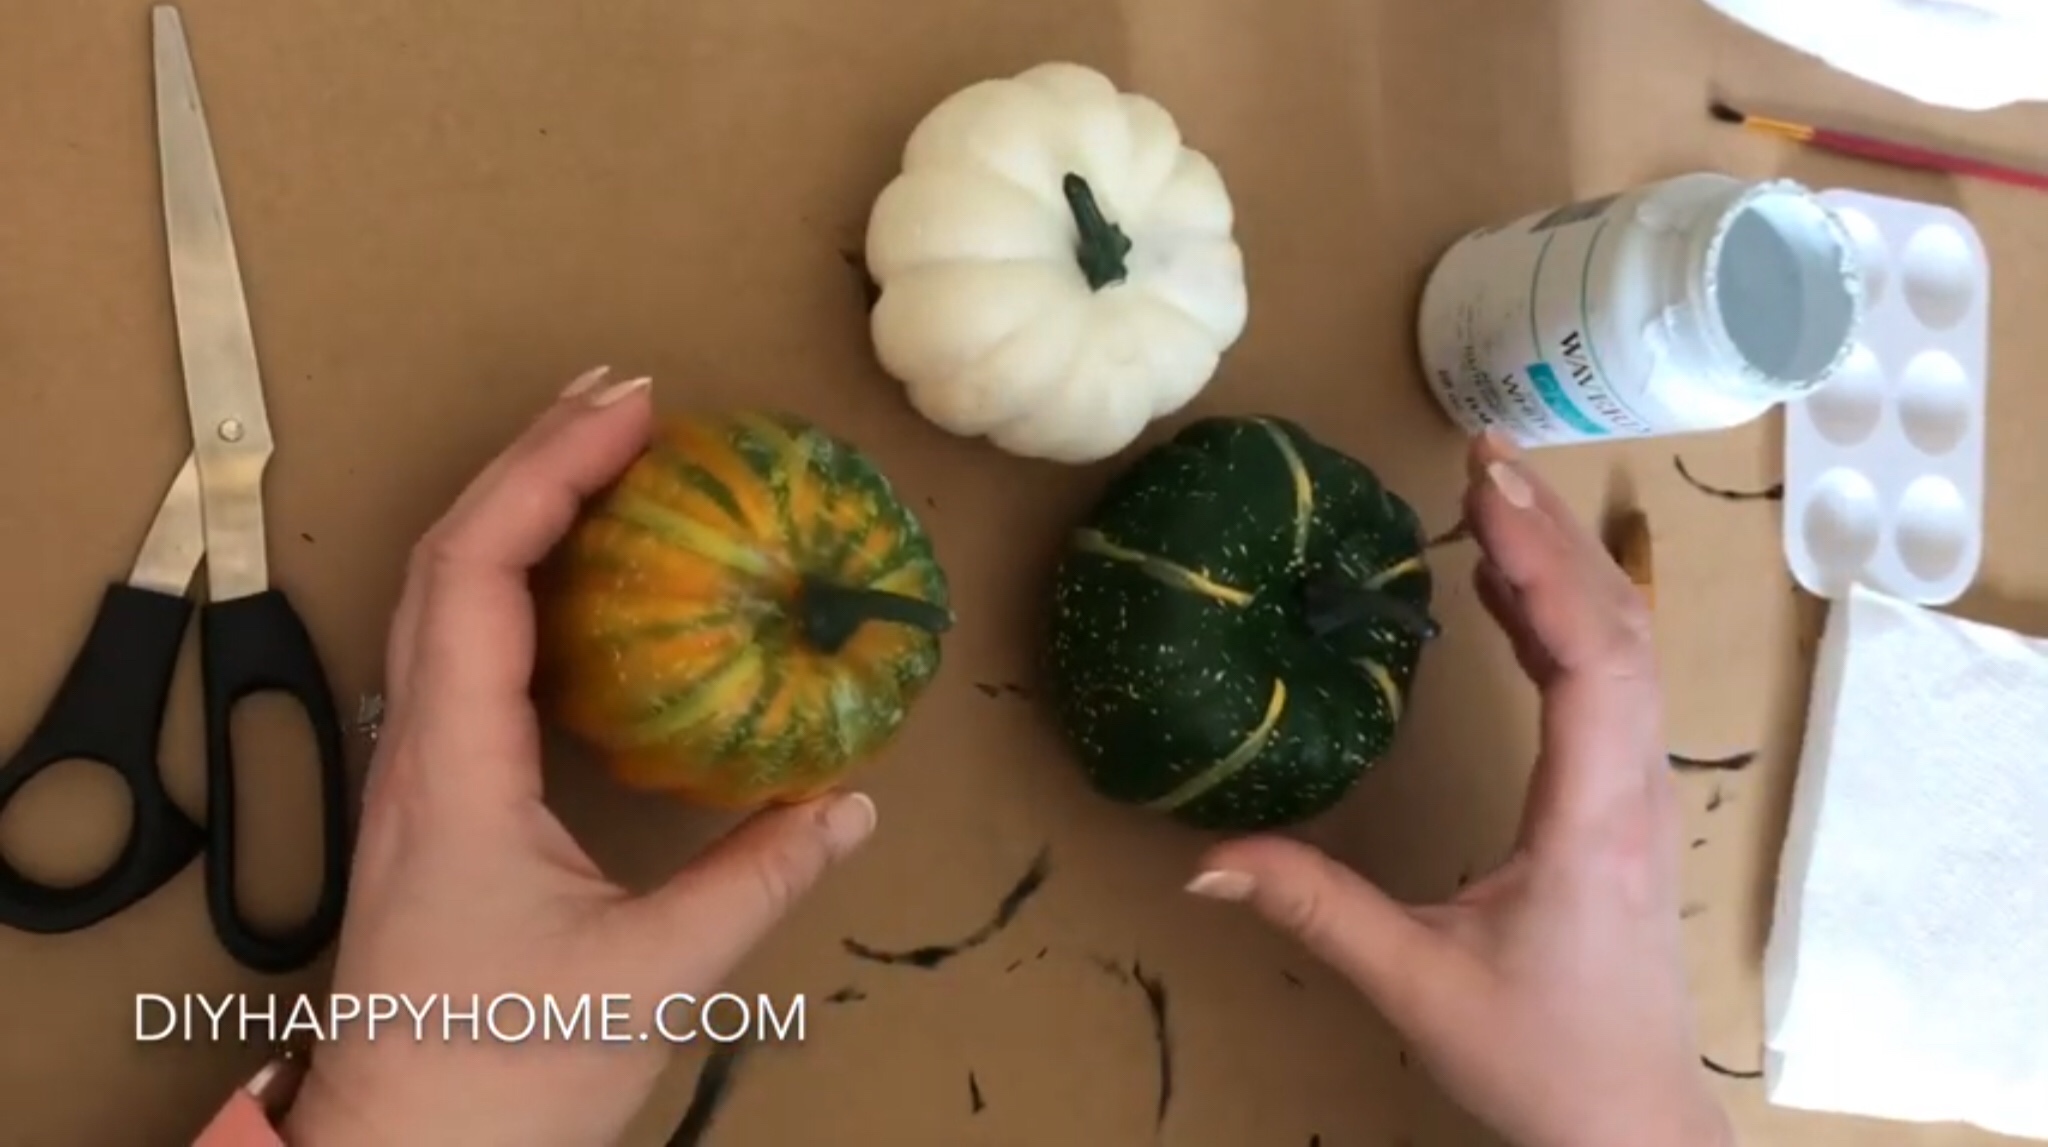
I decided the darker two pumpkins might show through the knit of the sweater. I decided to paint the pumpkins with Waverly white chalk paint. The Waverly white chalk paint dries pretty quickly and only one coat is necessary.

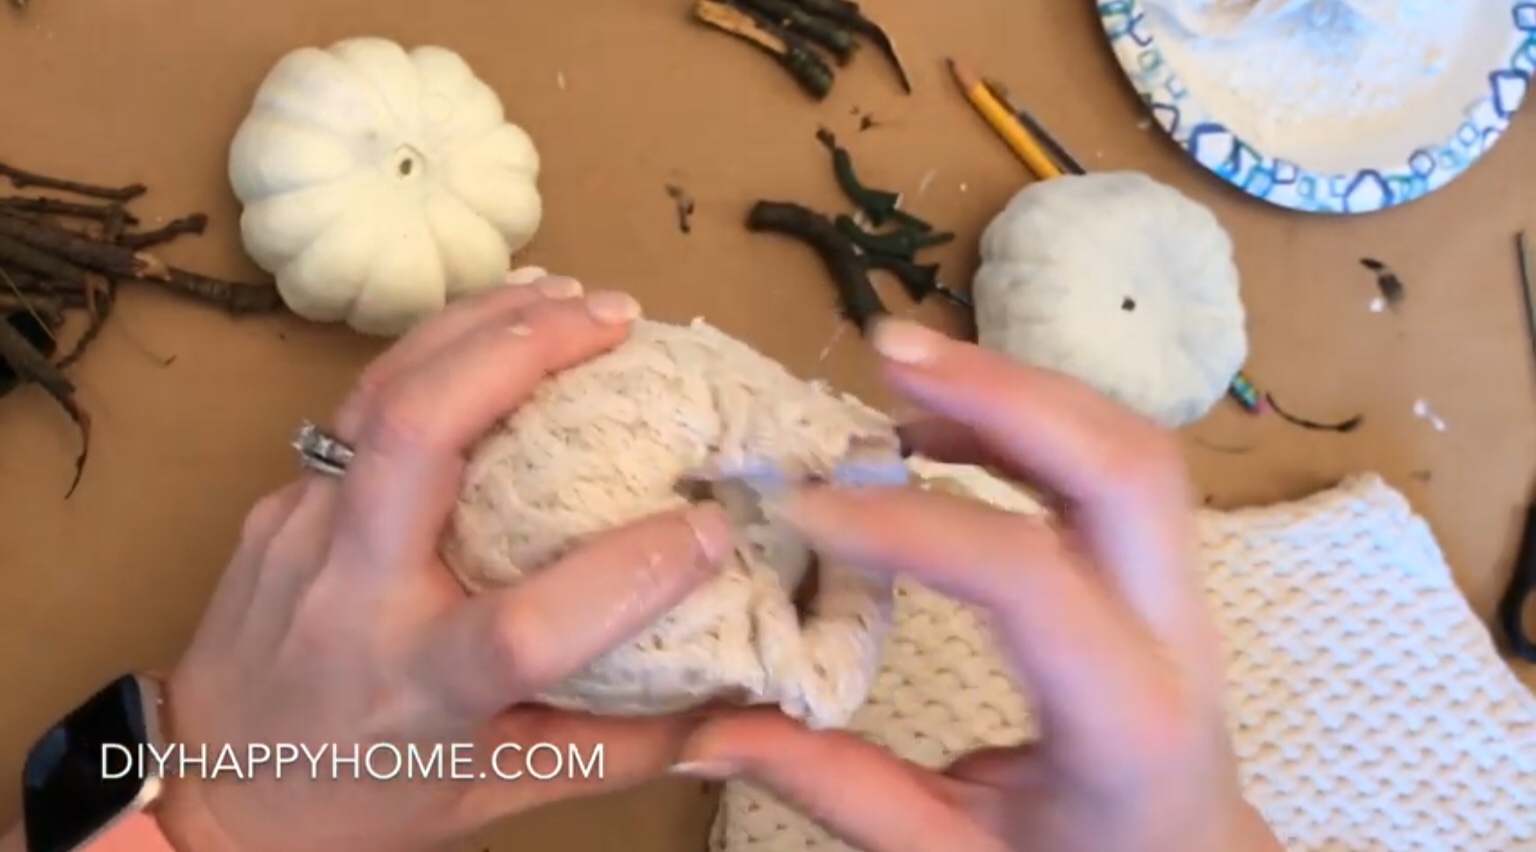
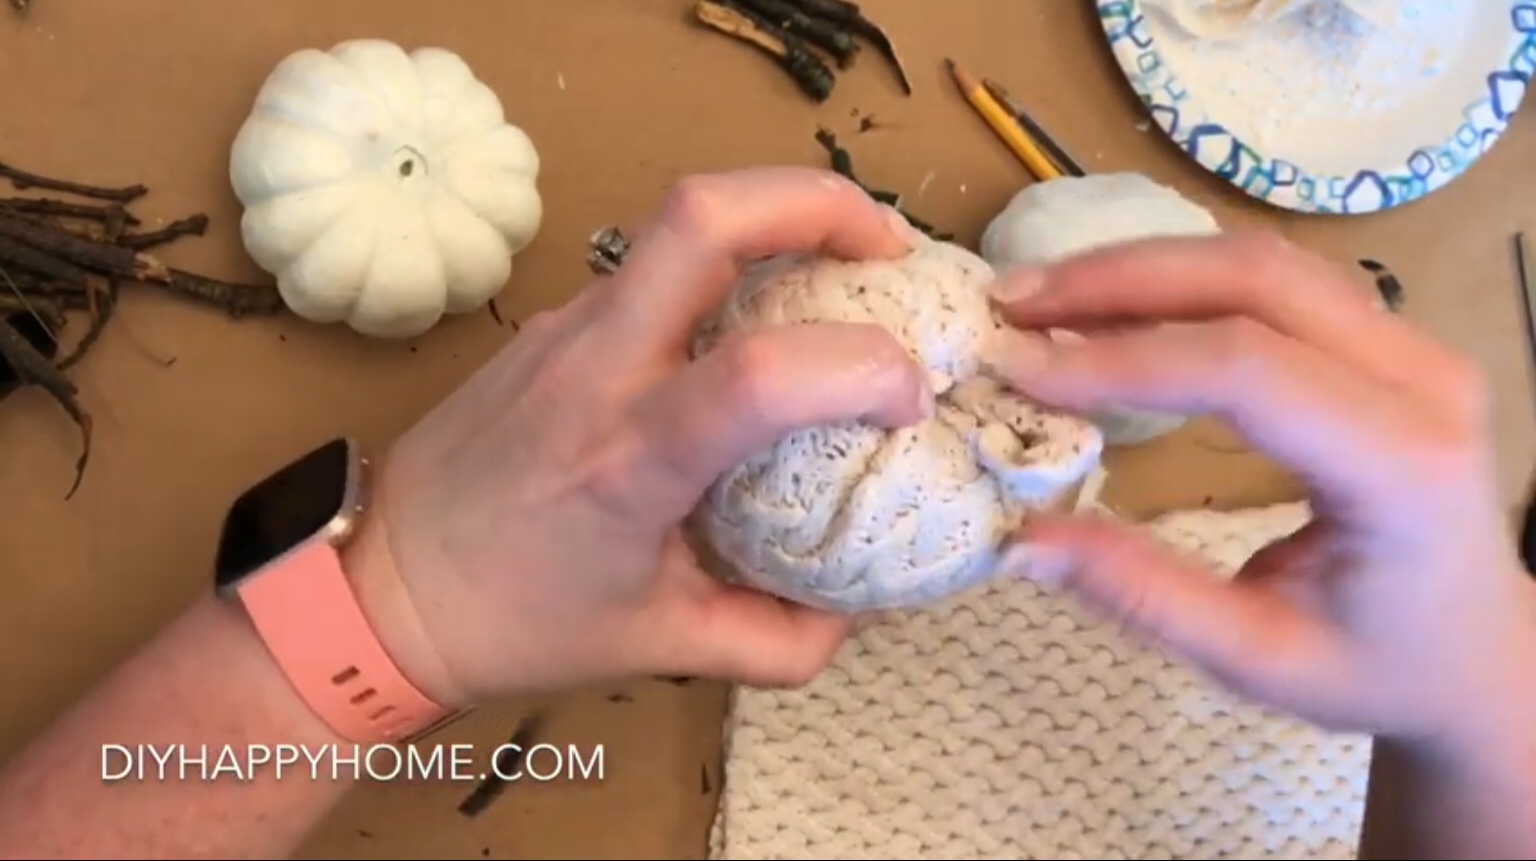
Once the pumpkins were dry, I made larger holes in the top and bottom of each styrofoam pumpkin. I happened to have the sleeve of a sweater left over from another craft project. You could get a sweater at the thrift store, use a stained sweater, or one you simply don’t like anymore. A stained sweater would be perfect for this project. So don’t throw out those old sweaters!


Carve the center of your styrofoam pumpkin out. It needs to be large enough to fold and tuck the fabric inside. You also need room to place a stem.

Place your pumpkin into the sleeve of the sweater and cut. Make sure you have enough fabric to cover the pumpkin.

Begin to fold and tuck the fabric into the top of the pumpkin, tucking it into the larger hole you’ve created. Keep folding and tucking until all of the fabric is tucked into the hole at the top of the pumpkin. Next, do the same to the bottom of the pumpkin. Create a larger hole, then fold and tuck in the fabric until all of the fabric is tucked into the bottom of the pumpkin.
Next, I used some branches to create stems.

I painted the stems with brown Folk Art Wax. Then, once the wax was dry, I dry brushed some Waverly white chalk paint gently on top of the wax.

Then I adorned the sweater pumpkins with garden twine. One pumpkin I wrapped the stem, another I tied a twine knot around the stem, and the third I wrapped and twisted around the pumpkin, to make it look like the grooves of a pumpkin.


I loved the way they turned out! They were one dollar each, and quick and easy to make! I think gray ones would be so cute! Please comment and let me know if you make the sweater pumpkins, and if so, what color would you make?

Please follow my blog for some fun future DIY projects. Please see my how-to video below. Thank you for joining me!
Carla 😊

Your pumpkins in sweaters are so cute. They’re all ready for the fall temperatures. 🎃
LikeLiked by 1 person
Thank you, Liz! I hope you make some too! 😊
LikeLike